How to Create a SharePoint Portal for Visitors to Upload Files
Here are the steps to create a secure SharePoint portal that allows guests to upload files that only they can see
The benefits of a portal like this is that new hires, prospective employees, existing employees or anyone else can upload files to a central repository that only the SharePoint owners or members can see
If you need a top notch team to managed your Office 365 security then reach out to this great managed IT services provider
How to Create the SharePoint Portal
Login to Office.com as a SharePoint admin and go the SharePoint admin portal
Click +CREATE to create the portal

Select Team site – Standard team – Use Template and then name the portal whatever you’d like (we use UPLOADS)
Set the owners to whoever should have the rights to see, edit or delete contents of the site.
Once the site is created, go to site’s Settings and select EXTERNAL FILE SHAREING – ANYONE
Now open up the SharePoint site but clicking on Site Address
Select +NEW and create a LIST – BLANK LIST
Name the list and leave the settings default
Find the new list on the left navigation menu and now we need to set the proper permissions
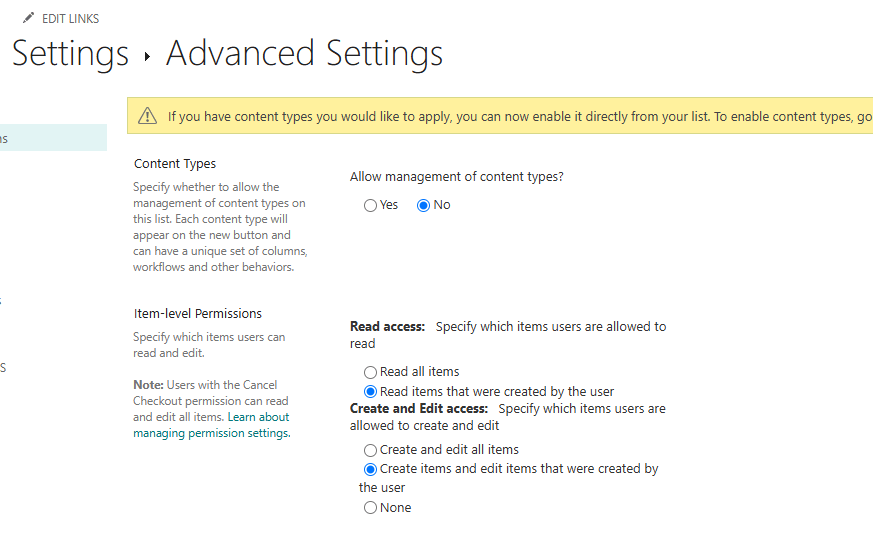
Click on the gear in the upper right corner and select LIST SETTINGS – Advanced settings
Set Advanced Settings to – “Read items that were created by user” and “Create Items and Edit items that were created by the user” – Hit OK to save changes

Now select Permission for this site
Disable Inheritance and then put a checkmark next to Upload Portal Visitors and select Edit a change their permissions to Contribute only and hit OK
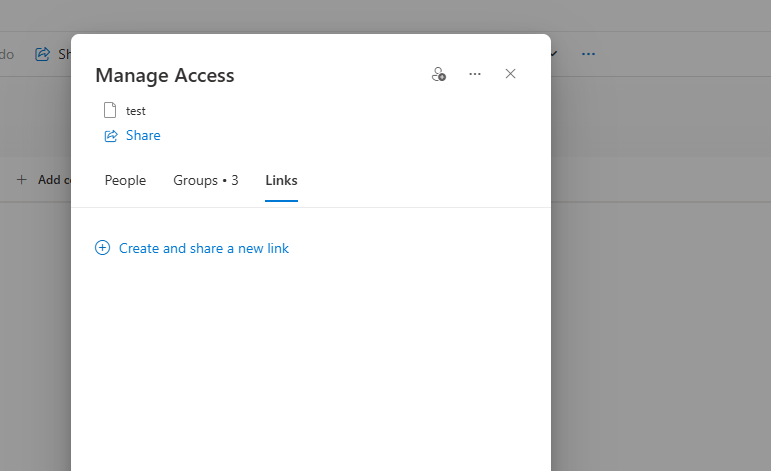
Now go back to site site and select MANAGE ACCESS – LINKS – Create a share a link – Click on the Gear at the bottom (next to copy link) and select ANYONE (if ANYONE is not a choice then you need to go back to the site settings and confirm you have set ANYONE in the External File Sharing settings)
Hit APPLY and then COPY LINK and then you can close the window and send the link out
Anyone can now login to the site, click ADD NEW ITEM – They will need to name the item (folder) and then can ADD ATTACHMENTS like docs, images or PDFs


